Part 2: WordPress Full Site Editing & Templates
In Part 1 we initialized our theme with a header, footer, and index file. That’s a great start, but now we need to add more template files.
Step 1: Page & Post Templates
Create 2 new files in your “templates” folder called page.html and single.html. The page.html file is for pages, naturally. And single.html is for posts.
Copy this code into both, then you can preview it to see what was done and change it to your liking. For example, you might want a previous/next post link on the single template, but not pages. Be sure not to hit save when changing the template, just copy the styles and paste into the files. And remember to keep the first and last line that are loading in the header/footer.
<!-- wp:template-part {"slug":"header","tagName":"header"} /-->

<!-- wp:group {"tagName":"main","style":{"spacing":{"margin":{"top":"var:preset|spacing|50"}}}} -->
<main class="wp-block-group" style="margin-top:var(--wp--preset--spacing--50)"><!-- wp:group {"layout":{"type":"constrained"}} -->
	<div class="wp-block-group"><!-- wp:post-featured-image {"height":"300px","overlayColor":"contrast","align":"wide","style":{"spacing":{"margin":{"bottom":"var:preset|spacing|50","top":"calc(-1 * var(u002du002dwpu002du002dpresetu002du002dspacingu002du002d50))"}}}} /-->

		<!-- wp:post-title {"level":1,"style":{"spacing":{"margin":{"bottom":"var:preset|spacing|40"}}}} /-->
	</div>
	<!-- /wp:group -->

	<!-- wp:post-content {"layout":{"type":"constrained"}} /-->
</main>
<!-- /wp:group -->

<!-- wp:template-part {"slug":"footer","tagName":"footer"} /-->
Step 2: 404 Templates
Visit the front end of your site and visit a page you know doesn’t exist. For me that would be “localhost/guide/fake” in the URL bar. You probably don’t see anything but a header and footer.
Create a new file in your “templates” folder called 404.html and place this code inside:
<!-- wp:template-part {"slug":"header","tagName":"header"} /-->

<!-- wp:group {"tagName":"main","layout":{"type":"constrained"}} -->
<main class="wp-block-group">
	<!-- wp:pattern {"slug":"custom/404"} /-->
</main>
<!-- /wp:group -->

<!-- wp:template-part {"slug":"footer","tagName":"footer"} /-->
We’re loading the header and footer parts as well as a new pattern we’ll make now.
Create a new file called 404.php inside of a new folder called “patterns”. The reason we’re creating another file is because we’ll be entering some generic text, but we want it to be translatable by other plugins. Inside that file copy this code:
<?php
/**
 * Title: 404
 * Slug: custom/404
 * Inserter: no
 */
?>

<!-- wp:group {"align":"wide","style":{"spacing":{"margin":{"top":"5px"}}},"layout":{"type":"constrained","wideSize":"400px"}} -->
<div class="wp-block-group alignwide">
	<!-- wp:heading {"textAlign":"center","level":1,"align":"wide"} -->
	<h1 class="alignwide has-text-align-center"><?php echo esc_html_x('404: Page not found', '404 error', 'custom'); ?></h1>
	<!-- /wp:heading -->

	<!-- wp:paragraph {"align":"center"} -->
	<p class="has-text-align-center"><?php echo esc_html_x('Maybe try a search?', 'encourage user to search'); ?></p>
	<!-- /wp:paragraph -->

	<!-- wp:search {"label":"<?php echo esc_html_x('Search', 'label', 'custom'); ?>","placeholder":"<?php echo esc_attr_x('Search...', 'placeholder for search field', 'custom'); ?>","showLabel":false,"width":100,"widthUnit":"%","buttonText":"<?php esc_attr_e('Search', 'custom'); ?>","buttonUseIcon":true,"align":"center"} /-->
</div>
<!-- /wp:group -->

<!-- wp:spacer {"height":"var(--wp--preset--spacing--70)"} -->
<div style="height:var(--wp--preset--spacing--70)" aria-hidden="true" class="wp-block-spacer"></div>
<!-- /wp:spacer -->
You can of course change this, but be careful. You want to keep the PHP logic in here, unless you know that your client won’t be doing any translations.
Refresh your 404 page and you should now see a message and a search bar. Which leads us to the next section!
Step 3: Search Template
While you’re still on your 404 page go ahead and type something in your search bar that you know will yield a result. For example, “sample” will work if you’re working on a fresh WordPress install.
By default, the index page is being used. That’s okay except we don’t have pagination and there’s no indication that it’s a search results page.
In your “templates” folder create a new file called search.html and add the following code:
<!-- wp:template-part {"slug":"header","tagName":"header"} /-->

<!-- wp:group {"tagName":"main","style":{"spacing":{"margin":{"top":"var:preset|spacing|70","bottom":"var:preset|spacing|70"}}},"layout":{"type":"constrained"}} -->
<main class="wp-block-group" style="margin-top:var(--wp--preset--spacing--70);margin-bottom:var(--wp--preset--spacing--70)">
	<!-- wp:query-title {"type":"search","align":"wide","style":{"spacing":{"margin":{"bottom":"var:preset|spacing|50"}}}} /-->

	<!-- wp:query {"query":{"perPage":6,"pages":0,"offset":0,"postType":"post","order":"desc","orderBy":"date","author":"","search":"","exclude":[],"sticky":"","inherit":true},"displayLayout":{"type":"flex","columns":3},"align":"wide","layout":{"type":"default"}} -->
	<div class="wp-block-query alignwide">
		<!-- wp:query-no-results -->
			<!-- wp:pattern {"slug":"custom/no-search-results"} /-->
		<!-- /wp:query-no-results -->

		<!-- wp:post-template {"align":"wide"} -->
			<!-- wp:post-featured-image {"isLink":true,"width":"100%","height":"max(15vw, 30vh)","align":"wide"} /-->
			<!-- wp:post-title {"isLink":true} /-->
			<!-- wp:post-excerpt /-->
			<!-- wp:post-date {"isLink":false} /-->

			<!-- wp:spacer {"height":"var(--wp--preset--spacing--70)"} -->
			<div style="height:var(--wp--preset--spacing--70)" aria-hidden="true" class="wp-block-spacer"></div>
			<!-- /wp:spacer -->
		<!-- /wp:post-template -->

		<!-- wp:query-pagination {"paginationArrow":"arrow","layout":{"type":"flex","justifyContent":"space-between"}} -->
			<!-- wp:query-pagination-previous {"label":"Newer Posts"} /-->
			<!-- wp:query-pagination-next {"label":"Older Posts"} /-->
		<!-- /wp:query-pagination -->
	</div>
	<!-- /wp:query -->
</main>
<!-- /wp:group -->

<!-- wp:template-part {"slug":"footer","tagName":"footer"} /-->
Create a new file in your “patterns” folder called no-search-results.php and add the following code:
<?php
/**
 * Title: Hidden No Results Content
 * Slug: custom/no-search-results
 * Inserter: no
 */
?>
<!-- wp:paragraph {"fontSize":"medium"} -->
<p class="has-medium-font-size">
<?php echo esc_html_x( 'Nothing found. Please try your search again.', 'message to display when there are no search results', 'custom' ); ?>
</p>
<!-- /wp:paragraph -->

<!-- wp:search {"label":"<?php echo esc_html_x( 'Search', 'label', 'custom' ); ?>","placeholder":"<?php echo esc_attr_x( 'Search...', 'placeholder for search field', 'custom' ); ?>","showLabel":false,"buttonText":"<?php esc_attr_e( 'Search', 'custom' ); ?>","buttonUseIcon":true} /-->
Again, we’re using this so the text can be used by a translator. The Inserter: no tells WordPress that this pattern cannot be selected by a user from the pattern picker.
If you refresh your search page you now get a new title that reminds the user of what they searched for, and shows the results.
Now try searching for a word you know doesn’t exist. You should see your message that nothing has been found, and the search bar should show up again.
Note: There seems to be a bug where if you get exactly one search result, the “nothing found” message appears. Don’t worry, you didn’t do anything wrong.
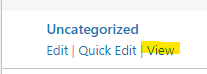
Step 4: Archive Template
To test your archive pages, you can go to the admin area and navigate to Posts > Categories. Hover your mouse over one of the categories and click “View.”
You’ll want to test this even if you aren’t linking to an archive page. People tend to land on the pages when searching through Google and other search engines.
You are currently seeing the index.html template being used. It is perfectly fine, but let’s create a specific one anyway. In your “templates” folder create an archive.html file and paste the following code:
<!-- wp:template-part {"slug":"header","tagName":"header"} /-->

<!-- wp:group {"tagName":"main","style":{"spacing":{"margin":{"top":"var:preset|spacing|70","bottom":"var:preset|spacing|70"}}},"layout":{"type":"constrained","contentSize":"1000px"}} -->
<main class="wp-block-group" style="margin-top:var(--wp--preset--spacing--70);margin-bottom:var(--wp--preset--spacing--70)"><!-- wp:query-title {"type":"archive","align":"wide","style":{"spacing":{"margin":{"bottom":"var:preset|spacing|50"}}}} /-->

	<!-- wp:query {"queryId":0,"query":{"perPage":6,"pages":0,"offset":0,"postType":"post","order":"desc","orderBy":"date","author":"","search":"","exclude":[],"sticky":"","inherit":true},"displayLayout":{"type":"flex","columns":2},"align":"wide","layout":{"type":"default"}} -->
	<div class="wp-block-query alignwide"><!-- wp:post-template {"align":"wide"} -->
		<!-- wp:post-featured-image {"isLink":true,"width":"100%","height":"max(15vw, 30vh)","align":"wide"} /-->

		<!-- wp:post-title {"isLink":true} /-->

		<!-- wp:post-excerpt /-->

		<!-- wp:post-date {"isLink":true} /-->

		<!-- wp:spacer {"height":"50px"} -->
		<div style="height:50px" aria-hidden="true" class="wp-block-spacer"></div>
		<!-- /wp:spacer -->
		<!-- /wp:post-template -->

		<!-- wp:query-pagination {"paginationArrow":"chevron","layout":{"type":"flex","justifyContent":"space-between"}} -->
		<!-- wp:query-pagination-previous {"label":"Newer Posts"} /-->

		<!-- wp:query-pagination-next {"label":"Older Posts"} /-->
		<!-- /wp:query-pagination -->
	</div>
	<!-- /wp:query -->
</main>
<!-- /wp:group -->

<!-- wp:template-part {"slug":"footer","tagName":"footer"} /-->
That covers all the templates! You now have a template for most of pages on the site.
Accessing the Templates
All of your templates are accessible now by navigating to Appearance > Editor. Once your theme is ready for use, the end-user can come in here and change the templates at any time.
Note: Once a template has been edited on the admin side, the template files you’ve created are no longer being used.
When you select either Templates or Template Parts you can select “Manage all templates” to see the status of each one. The statuses are marked by the “Added by” column
- Custom – means this is pulling from the theme
- Custom Customized – means the template has been editing and is now pulling from the database
- “username” – means it was created in the admin area by a specific user
See screenshot:
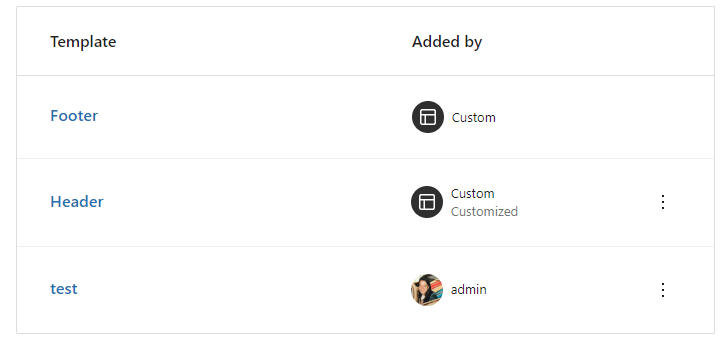
To reset a custom template you can click the 3 dots to the right and click “clear customization.”
This article is already pretty long, so next time we’ll cover creating custom templates.
